Image annotation is the foundation of computer vision, enabling AI systems to recognize, classify, and understand visual data. This guide explains the main types of image annotation, when to use each technique, and how consistent labeling and quality control improve model performance across industries such as automation, retail, healthcare, and manufacturing.

Computer scientists have been trying to tackle image recognition since 1966. An MIT professor thought it would take a group of undergraduates a single summer to connect a camera to a computer and teach it to describe what it saw. That early experiment sparked a field that now powers everything from self-driving cars to medical diagnostics.
Decades later, image recognition has become both predictable and reliable. But how does it actually work?
Like many forms of machine learning, image recognition is powered by image annotation, the process of labeling visual data so AI models can learn to identify and classify what they see.
In this guide, you’ll explore:
Keep reading to learn how image annotation works, how to select the right approach for your project, and how accurate, high-quality training data enables reliable computer vision performance.
Image annotation is the process of describing an image so that a computer model can use the resulting labels to accurately classify images with similar subjects.
An AI doesn’t know what’s in a picture unless someone tells it first. That process, known as image labeling (or “tagging”), involves an image annotator assigning labels that describe what the picture contains. Once an AI “sees” enough labeled images, it can begin identifying the contents of new, unlabeled pictures.
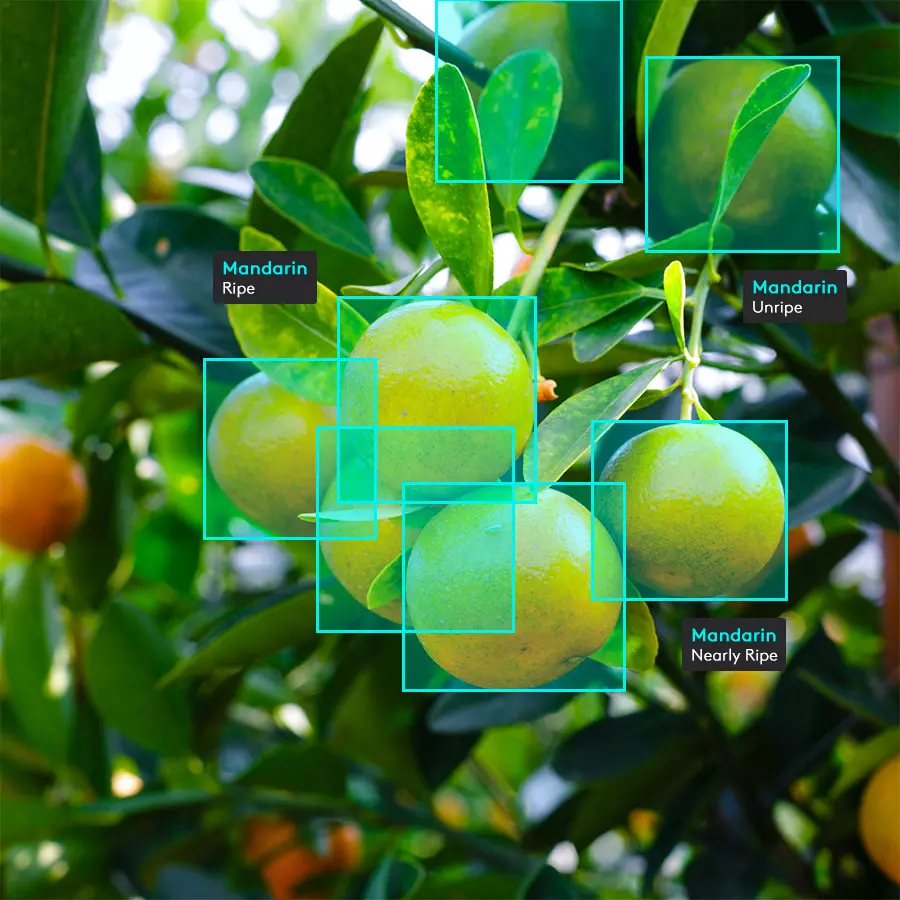
Image labeling falls under the broader field of data annotation, which prepares data for training AI models. It plays a major role in supervised learning, where developers compare an AI model’s output to a skilled human's to ensure accuracy.
Developers commonly use image labeling to detect objects in images or classify those images into specific categories. Segmentation is a more advanced usage that involves drawing masks that allow AI models to categorize every pixel in an image. Pose estimation, meanwhile, involves annotating an image with keypoints and landmarks to help a model decide what a person (or industrial machine) is doing in an image and potentially predict their next movements.
Just as there are many types of image recognition, there are also many types of image annotation. Here are some categories that may be relevant for your project.
Image classification means assigning a single label to an entire image. In this image annotation example, if there’s a picture where the dominant subject is a cat, the annotator labels the entire image as “cat.” This rule holds even if there are other objects in the image's background.
This type of image annotation works best when the image is easy to classify: when there’s a single dominant object in the frame. It can also be effective for broader scene-level labeling, where the overall activity or context can be summarized concisely (e.g., “people shopping,” “football game,” “business meeting”). In more specialized domains, such as retail or medical imaging, classification may follow a hierarchical or tree-style structure (e.g., game → sports → football) to capture different levels of specificity.
Image classification works well because it’s the single fastest annotation method. If you have many relatively simple images and want to minimize your cost per label, this is the method to choose.
If you need something identified quickly from a single clear image, this type of image classification is a good choice. Some examples include:
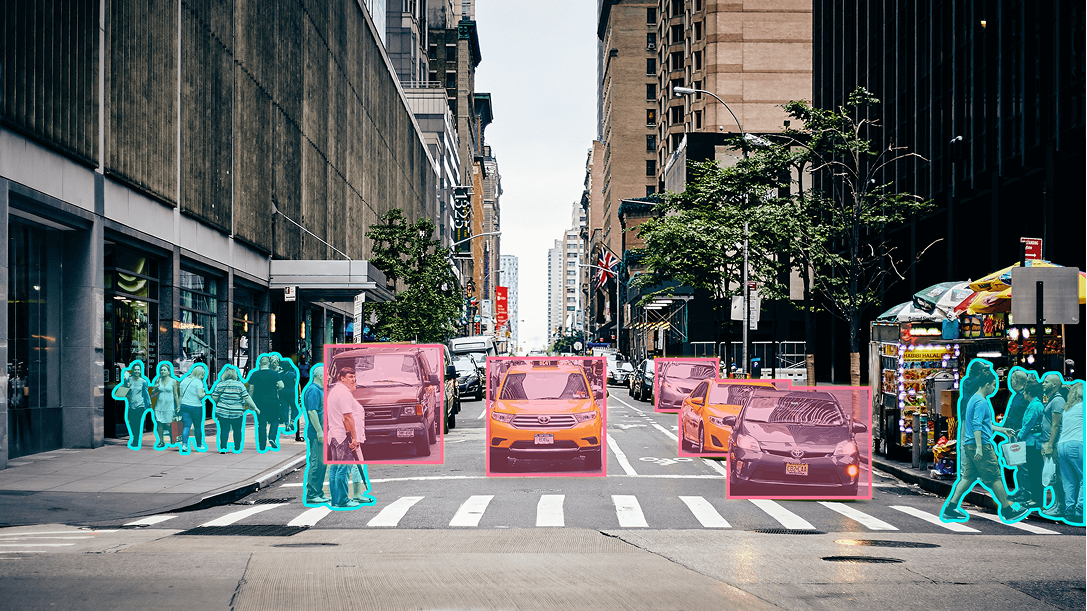
Object detection allows you to identify multiple objects in a single image—such as a car, a pedestrian, or a baby stroller—and determine where each object is located within the image.
There are two simple methods for object detection in image annotation. Bounding box annotation involves drawing 2D rectangles to represent the object’s position in an image. Cuboid annotations are in 3D and help define the object’s depth when necessary.
There are a few ways for AI models to ingest object detection annotations:
AI-driven object detection powers a range of innovative applications, including:
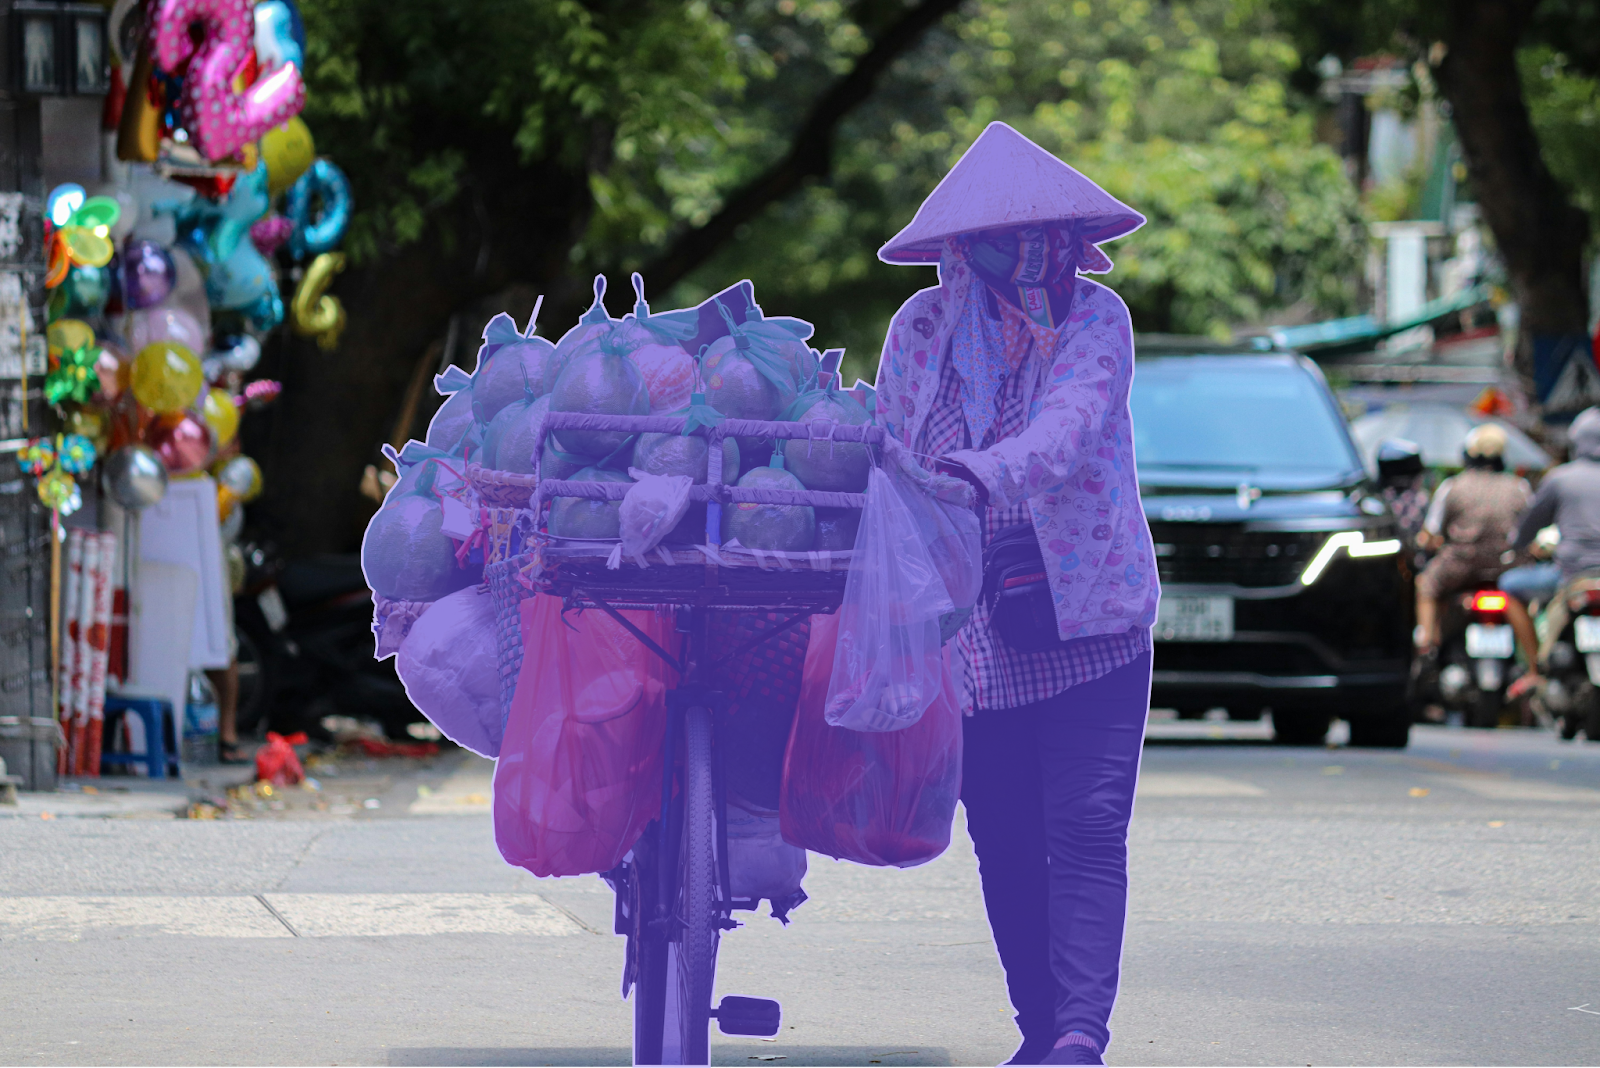
Segmentation goes beyond bounding boxes and cuboids to define every pixel in an image using a technique called masking. There are three basic types of segmentation.
Although segmentation is much more precise than bounding boxes, annotating images with semantic data is core to applications such as autonomous driving and augmented reality.
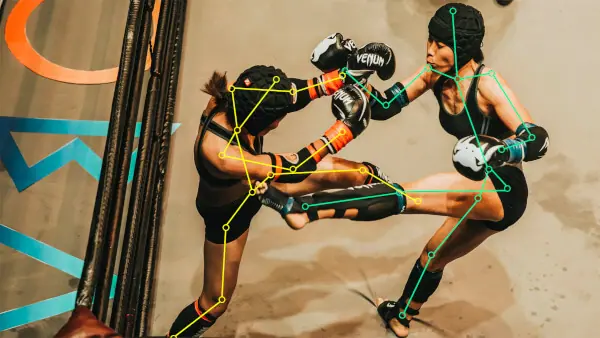
Keypoint annotation involves marking specific points, such as joints, landmarks, and other features, on objects ranging from livestock to people to industrial machinery.
Keypoint annotation for pose estimation is commonly used to assist in identification or communication. In facial recognition, for instance, facial landmarks are assigned in order to help machine learning models tell people apart. In a different context, pose estimation keypoints help recognize hand gestures and potentially interpret sign language.
In some cases, objects in images can be positioned such that one limb or joint is hidden behind another. This situation is known as an occlusion. Occlusions make it difficult for machine learning models to understand an object’s pose.
One of the ways to solve this issue is by using a visibility flag. This kind of label identifies keypoints that aren’t visible and enables the model to extrapolate the positions of occluded keypoints.
Here are a few of the most common use cases for keypoint annotation:
Polylines are used to trace linear structures that appear in the environment, such as roads, sidewalks, power lines, and boundaries. They’re often used to identify these structures to assist in navigation, mapmaking, or geospatial analysis.

Lane annotation is commonly used in applications such as autonomous driving to indicate the drivable area, but there are a few considerations. In this application, polyline annotation must take directionality into account. This means that they ensure lanes are marked for the correct direction of travel. In addition, they should be cautious to indicate how lanes connect at intersections to prevent the model from causing accidents.
Polygon annotation allows for irregular shape annotation using vertices instead of rectangles. Effectively, this is a compromise between low-detail bounding boxes and resource-intensive segmentation. They can be used to trace asymmetric objects, organic shapes, and complex boundaries.
Irregular shape annotation is helpful for complex shapes when extreme detail is not required. Polygons can be used to highlight defects in manufactured goods, identify crops in agricultural contexts, and highlight landmarks such as product cutouts in the retail environment.
Choosing the right image annotation formats means balancing your need for detail against considerations such as time and cost. When discussing bounding box vs polygon annotation, for example, you’ll find that bounding boxes reduce time and budget, but polygons have higher resolution. Other considerations include the downstream task–why you’re trying to recognize an object–and the complexity of the object in question.
Note that it’s possible to combine different image annotation formats based on your requirements. Panoptic segmentation combines semantic and instance segmentation, for example, but it’s also possible to combine bounding boxes and polygons.
Annotating images involves covering as much of the subject as possible without including any extraneous data. Here are some tips to help you out.
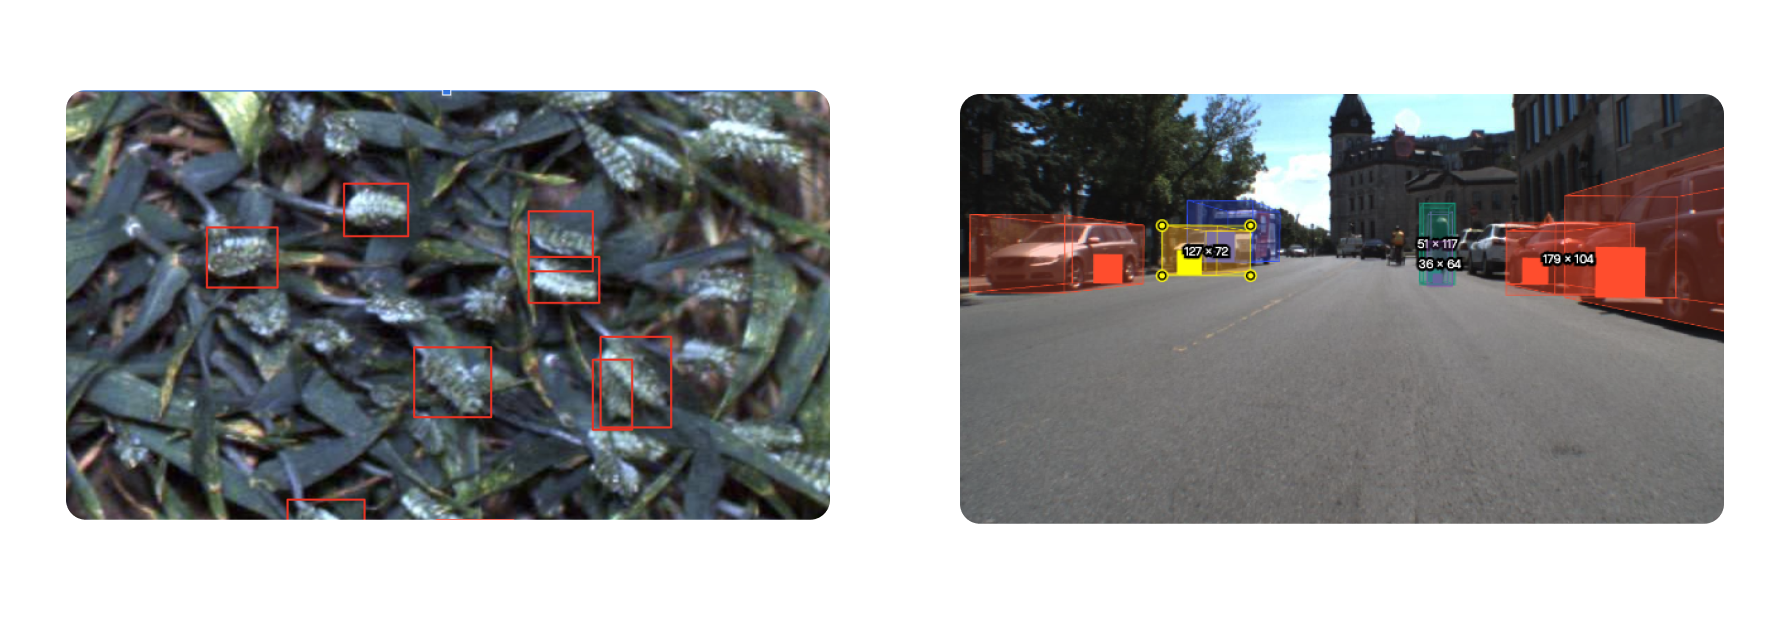
Referring to the suggestion above, bounding boxes need to fully enclose the object while hewing closely to its boundaries. That’s what’s known as a “tight box.”
Some additional bounding box annotation best practices include:
This process should usually result in tight bounding boxes, but here are some mistakes to avoid:
To create the cleanest possible data, you should skip objects when they are too small, too occluded, or otherwise too ambiguous to highlight.
Polygon annotation best practices often refer to the choice between polygons and boxes. Choose polygons when you need to highlight objects that are irregular in shape or whose profiles change with the viewing angle.
Here are some image annotation techniques specific to polygons:
Note that tracing a polygon is also the fundamental step towards masking for image and semantic segmentation. In these cases, the annotator must pay close attention to vertex density guidelines. Higher vertex density provides more detail, but fewer vertices usually result in faster output.
The last question of polygon annotation is how to handle edge cases such as holes and complex boundaries. This process will often depend on the annotation format. For example, some tools have features that allow them to delete holes in polygons, but others may require workarounds. Project owners must provide precise guidelines for annotators to help them navigate these issues.
Keypoint annotation for post estimation starts with defining the skeleton schema. That step involves telling annotators which formats to use and how many points are required. A good keypoint annotation guide might specify the COCO format and require 17 keypoints per human pose.
The skeleton annotation workflow starts with placing the keypoints in the correct order according to your scheme, e.g., starting from the trunk and working towards the limbs. Next, the annotator marks visible joints and flags occluded joints with a visibility label.
Quality checks should focus on whether the keypoints are symmetrical and anatomically plausible. To reinforce quality, create domain-specific schemas for the objects you’re working on, such as faces, hands, and animals.
If you’re asking how to prepare images for annotation, the answer is that good image annotation starts with good images. When possible, start with clear, high-resolution images that are in a common format. Remove duplicates from your dataset to avoid wasted effort.
To ensure that the model provides good results, dataset diversity is key. Make sure your subjects are presented under different lighting conditions, at different angles, and against various backgrounds. Also, be sure to include edge cases that might otherwise confuse the model under real-world conditions.
Next, set up your annotators for success by creating a schema with a clearly defined taxonomy. It should include classes, attributes, and allowed values. To avoid rework, be sure to provide detailed instructions on how to process unexpected situations involving:
Detailed annotation guidelines for dataset labeling will help your annotators maximize their workflow and meet quality benchmarks.
Let’s look at some images with annotations to understand a little more about best practices.
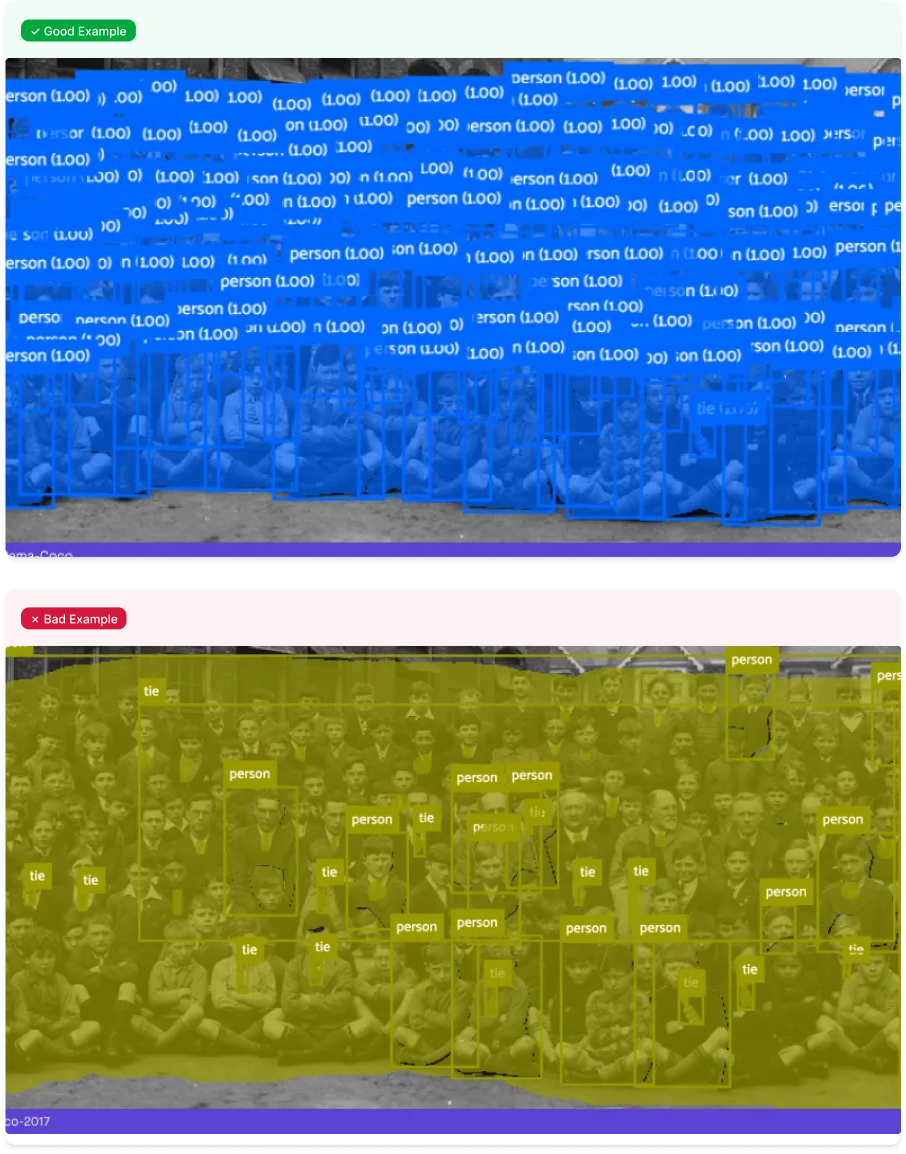
In this image annotation example, the “good” bounding box is drawn tightly around the object with little to no padding, whereas the “bad” bounding box is drawn inconsistently, with excessive padding along the bottom edge.
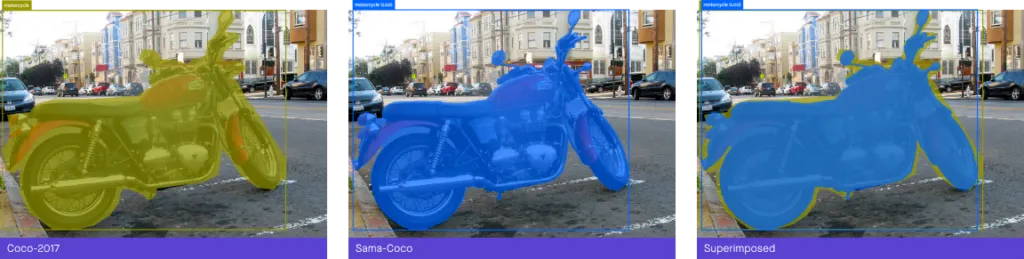
In this annotated picture example, we see that a good mask has many vertices around complex features, allowing it to conform evenly to the object. In the bad example, there are too few vertices to meet quality guidelines, resulting in a jagged mask that doesn’t consistently overlap the object under review.
Do you want to experiment with image annotation before beginning your project? COCO and Open Images both have practice datasets you can use before you start training your model. Alternatively, reach out to our team for additional data annotation support.
Before we conclude, let’s explore some common image annotation use-cases as well as any special considerations that might occur.
Image recognition turned out to be much more than a summer project for undergraduates, and it would not exist without image annotation. For computers to describe what they see, they must be told what they’re looking at–many, many times over. In addition, the quality of the description, which involves the consistency and accuracy of the labels, will directly impact model performance.
Because of the complexities involved with image annotation for machine learning, we recommend starting with a pilot project and then iterating. And if you need help, we invite you to tap into the expertise available on the Sama Platform.
Our annotation, validation, and evaluation data services can convert your raw data into high-quality training data, allowing you to focus on innovation and deliver the future of computing.
Talk to an expert and start your image annotation journey today.
Sama provides ML Professionals and AI team Leads with an indispensable solution for Computer Vision data labeling.
